3D Wooden AK-47 Model Kit: Build a Display-Ready Replica
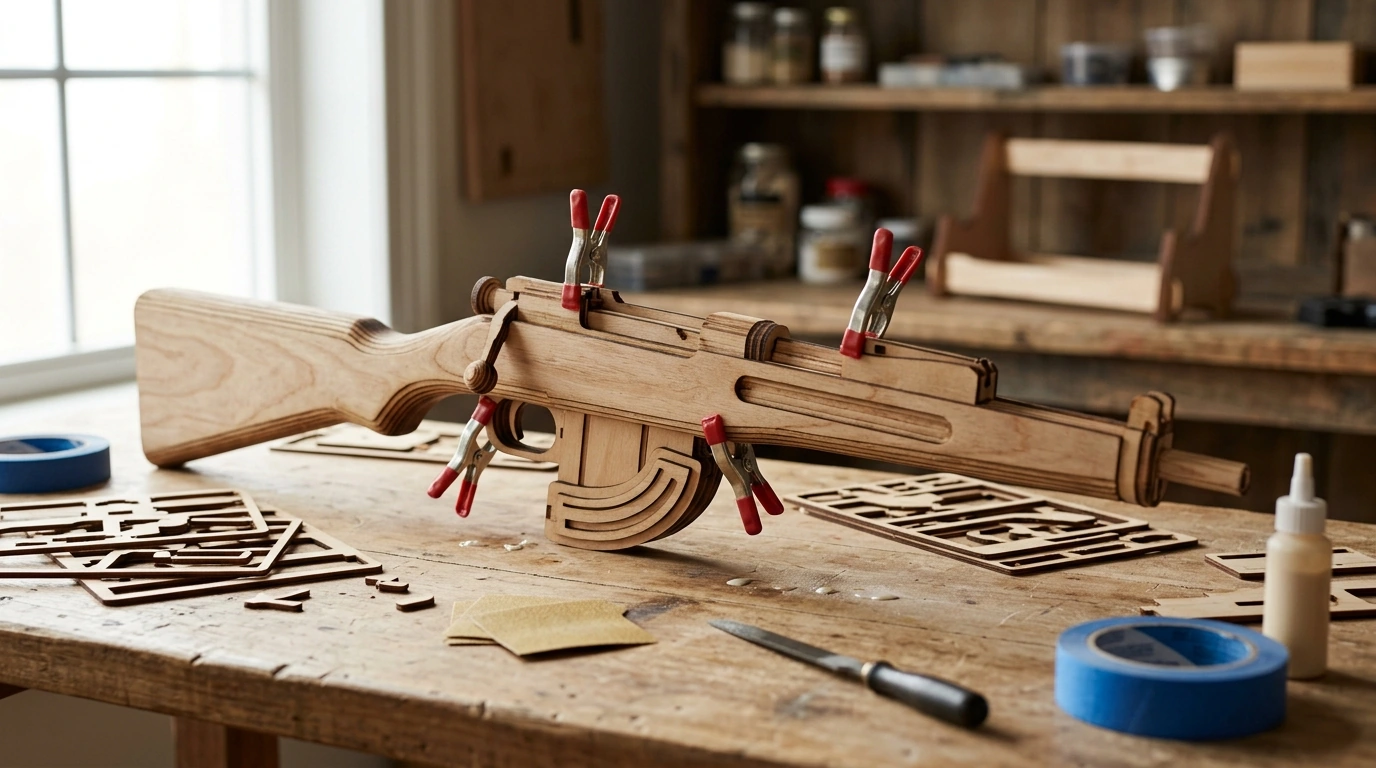
3D Wooden AK-47 Rifle Model Kit
A hands-on wooden build that brings the iconic AK-47 silhouette to life as a display-ready model. Designed for makers and collectors, it focuses on the satisfaction of assembly, the look of natural wood, and a finished piece that stands out on a shelf or desk. For historical background on the rifle’s real-world design lineage, see AK-47; for a deeper look at how wood behaves over time (including moisture and stability), the U.S. Forest Service offers a helpful reference in the Wood Handbook.
What This Model Kit Is
This is a wooden, assemble-it-yourself replica-style model intended for display and hobby building. The appeal comes from the process: fitting layered components together, watching the profile emerge, and ending with a décor piece that looks great in a workshop, office, or hobby room.
- Wooden model kit made for careful, step-by-step assembly and shelf display.
- A construction experience that rewards patience, alignment, and neat fitting.
- A conversation-piece accent for desks, display cases, and maker spaces.
- Gift-friendly for builders who enjoy mechanical-style models and recognizable silhouettes.
Highlights That Make the Build Enjoyable
Wood kits shine when the build feels tactile and “hands-on” from start to finish. This style of model uses layered pieces to add dimension, so the final result doesn’t look flat—it reads like a miniature object with depth along the receiver area, stock, and handguard lines.
- Layered wooden parts add definition and visual depth across major sections.
- Natural finish that can be left raw for a warm, craft look or sealed for a smoother feel.
- No screen time required—well-suited to a focused, unplugged weekend project.
- Photographs nicely against darker backdrops or on rustic shelving where the wood grain stands out.
Build Experience and Skill Level
This kit is best for patient builders who like the rhythm of dry-fitting before committing to final assembly. Long straight edges and symmetrical elements benefit from slow alignment checks as you go, especially if the design relies on tight tolerances.
- Recommended for builders who enjoy test-fitting and making small refinements.
- Take extra care aligning long, straight sections to keep the final profile crisp.
- Helpful basics: a small file, fine sandpaper, and (if required) a small amount of wood glue.
- Recommended for teens and adults; younger builders may need supervision due to small parts and tools.
If you want a cleaner finish, a quick pass with fine sandpaper along cut edges can reduce fuzzing and make parts slide together more smoothly. For glue-assisted builds, painter’s tape or small clamps can help hold alignment while adhesive sets.
Materials, Finish, and Display Options
Wood models look great right out of the box, but finishing can elevate the final presentation. Even a light edge-sanding step can make the build look more “finished” and less like raw cut stock.
- Light sanding along edges can improve both fit and visual polish.
- Optional finishes: clear varnish for shine, matte polyurethane for a natural tone, or stain for deeper color.
- Display ideas: a simple stand, a wall mount, or a shadow box to keep it level and dust-managed.
- Avoid high humidity to reduce the chance of wood warping over time.
For display styling, pairing natural wood with darker metal or black shelves tends to increase contrast and make the silhouette read clearly from across the room.
Quick Specs to Check Before Buying
Before ordering, it helps to confirm a few practical details so the build goes smoothly and the finished piece fits the intended space.
| Detail to confirm | Why it matters |
|---|---|
| Finished dimensions | Ensures it fits a shelf, desk, or display case |
| Assembly method (press-fit vs. glue) | Determines tool needs and build difficulty |
| Parts count / complexity | Helps estimate build time and patience required |
| Included instructions | Clear diagrams reduce mistakes and rework |
| Recommended age | Small parts and tools may require supervision |
Care, Storage, and Long-Term Durability
Like most wooden models, longevity comes down to gentle cleaning and stable storage. Keeping it away from excess moisture and heat helps preserve alignment and prevents subtle material movement over time.
- Dust with a soft brush or microfiber cloth; avoid soaking wood surfaces.
- If sealed, keep away from heat sources that can soften finishes or dry the wood.
- For minor edge fuzzing, touch up with very fine sandpaper and re-seal if needed.
- Store in a stable, dry environment to preserve alignment.
Product Options Available Now
- 3D Wooden AK-47 Rifle Model Kit — in stock and ready to ship; a solid pick for patient hobby builders and collectors who want a striking shelf piece.
- Nordic Girl Diver Reading Figurine — a complementary décor accent for a shelf or desk display arrangement, especially if you like mixing wood crafts with modern sculpture-style pieces.
- One Row Crystal Men’s Ring – Hip Hop Iced Out CZ Pave Ring in Gold and Silver — a giftable add-on if you’re putting together a “maker-and-style” bundle for a birthday or holiday.
FAQ
Does the kit require glue or special tools?
Some wooden model kits are press-fit, while others are glue-assisted, so it’s best to confirm the assembly method before starting. Fine sandpaper and a small file are helpful either way, and tape or small clamps can help keep long sections aligned if glue is used.
How long does it take to assemble a wooden rifle model like this?
Plan on a few hours to a full weekend depending on parts count, fit tolerance, and your pace. Dry-fitting and light sanding can add time, but they usually improve alignment and the overall finish.
Is it intended for play or display?
It’s intended as a hobby model for display rather than a toy. Because small parts and tools may be involved during assembly, it should be kept out of reach of young children unless supervised.









Leave a comment